#LawsandBestPractices

Amanda Farrell - 2 years ago

Amanda Farrell - 3 years ago


If you’re new to remote online notarization or digital closings, it’s understandable to be nervous or confused about where to start. You probably have a ton of questions on how to do something, when to do something, or if you’ll be able to do something while using ProperSign. Here are some of the most common questions we hear and tips to help you eSign and eNotarize with confidence.
The digital certificate can be a confusing concept to understand. It doesn’t exist in a traditional notary’s toolbox, but it’s arguably the most important aspect of electronic notarizations.
While the name may remind you of a notarial certificate, these aren’t the same thing. The digital certificate performs two critical tasks:
You can’t see the digital certificate on the document. Instead, it’s stored within the metadata of an electronic document. As one of our software developers, Donnie Groves, explains, “Think of the digital certificate as placing a laminating sheet on top of a document. Anyone can put stuff on top of it, but the stuff underneath can’t be altered. You’ll know someone tried to change anything when you remove the lamination.”
Because the certificate is tied to a specific notary’s identity, it also acts as a kind of lockbox for your notary seal and signature.
Digital certificates can be purchased by third parties like the National Notary Association and must be renewed on a regular basis, usually every one to five years.
ProperSign issues and maintains the digital certification on behalf of all notaries with a subscription at no additional cost. There’s no need to purchase a digital certificate if you’re subscribing to ProperSign as your only RON platform.
Yes. Some states require notaries to purchase and register a digital certificate with their commissioning authority. Notaries must use this single certificate for all transactions across all platforms.
There are two digital certificate options for ProperSign users. Purchase and upload a third-party digital certificate from IdenTrust or request ProperSign to issue a digital certificate on your behalf.
If you aren’t sure whether you need to purchase and register your digital certificate before choosing a RON platform, be sure to visit your commissioning authority’s website for guidance.
Want to take an inside look at ProperSign? Sign up for a demo!
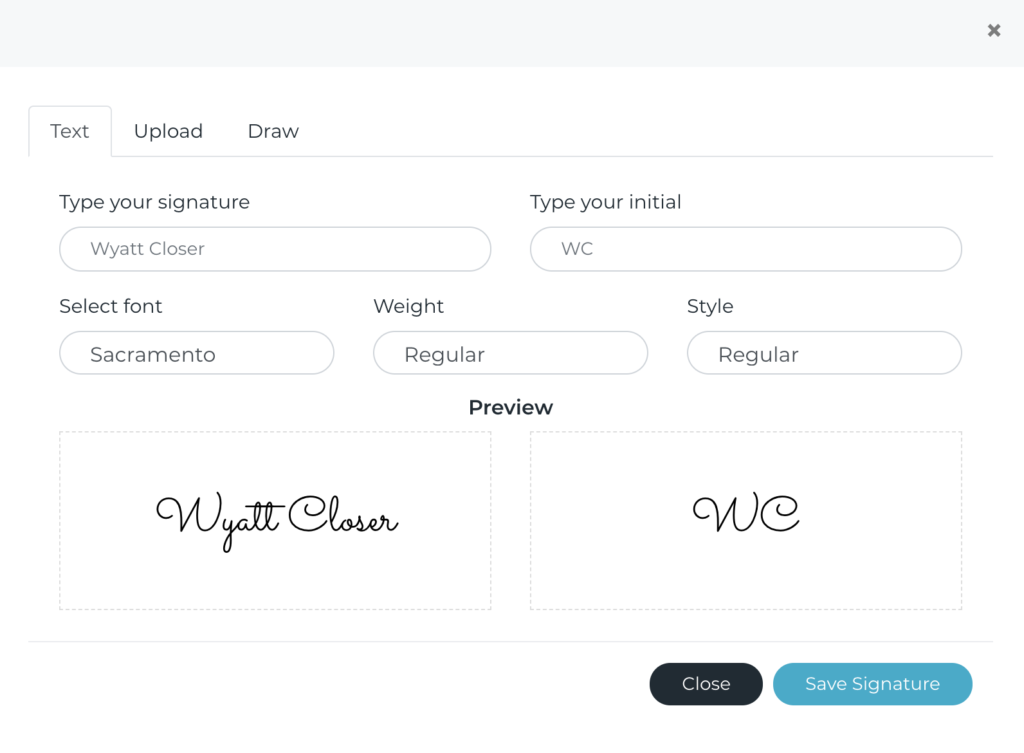
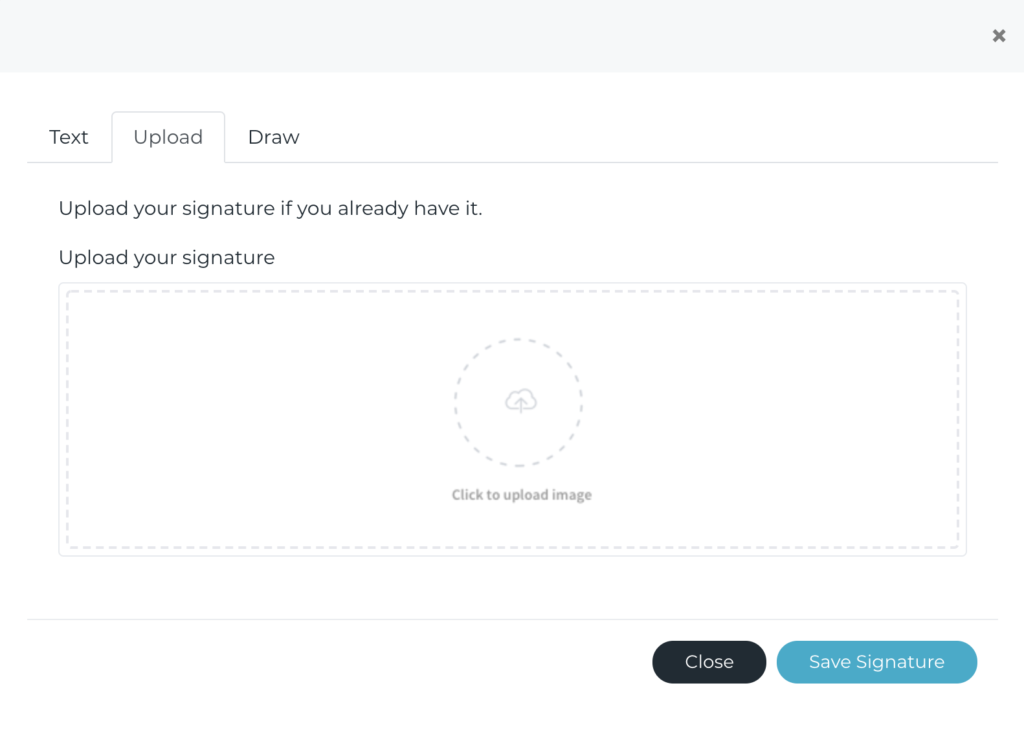
When you set up your account, you’ll see these Helpful Hints. Everyone participating in a ProperSign signing event will be prompted to create their digital signature beforehand.
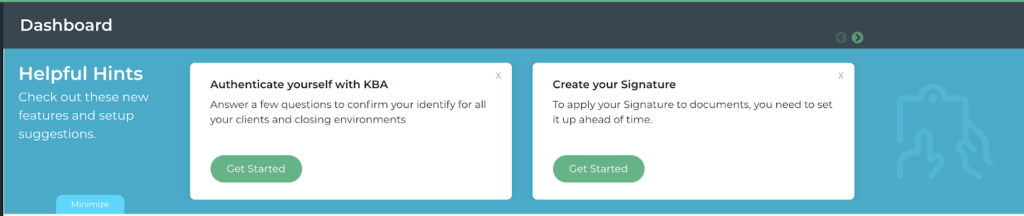
You can also navigate to My Account > Profile > Signature. Here you can add or update your signature and initials.

If you or another party forgets to complete this before the signing event, ProperSign will prompt the individual to create the digital signature before moving forward.
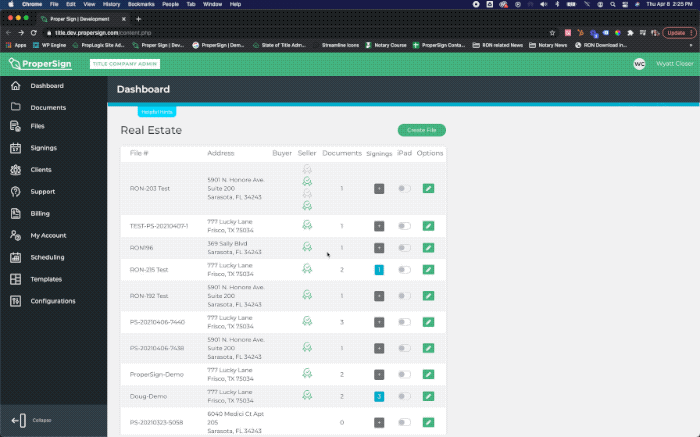
You can create a file for eSigning or eNotarization by going to either Dashboard or Files on the left sidebar menu.
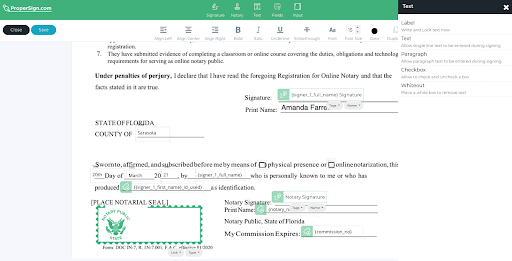
After uploading a document, click on the blue hamburger icon and select “Edit” from the drop-down menu.
1. Signature – creates a field to allow all parties designated on the file to apply their signatures, initials, and signing date.
2. Notary – apply notary seal field, associate notarial certificate, add notary name, signature, initial, commission expiration date, and commission number fields to the document.
3. Text – these options allow you to make specific changes to one document. Text elements include:
4. Fields – creates custom fields related to your file information like file number, customer name, customer, email, and customer phone number.
5. Input – adds a field to pull in information based on your singing event, like the signing date.
In addition to placing tags manually on a document with the Edit option, you can add tags with templates. Templates help you format standard information for a document, so you don’t have to recreate it every time. There are two types of templates in ProperSign:

To create a document template or a tagging layer template:
Once you’ve uploaded the document, click on the edit icon to add the appropriate tags.
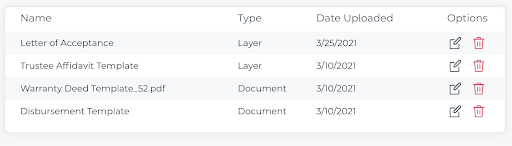
You’ll have access to all the same tags and editing elements listed above.
After choosing the file type and uploading a document, click the gray square with a plus button next to the file to schedule a signing event. In the pop-up, you’ll give the signing event a name, designate the signer, set the date and time, and choose a notary and witness from your team to join.


When a signing is scheduled successfully, you’ll see the gray square has turned blue with a number indicating the number of signing events associated with the file.
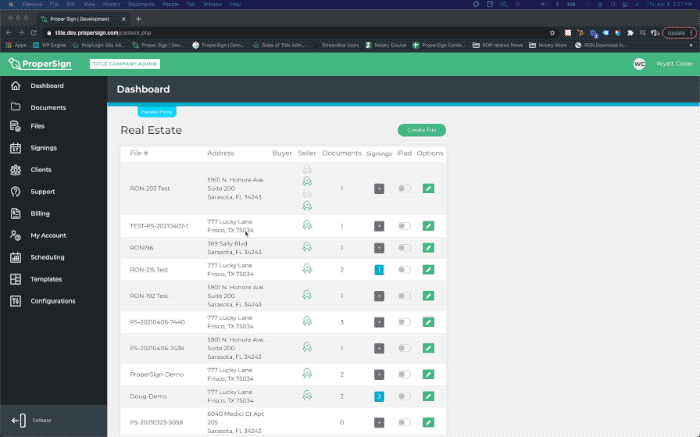
To launch the signing event, click the blue box with the number inside. A menu will appear to the right of your files with the following options: Delete, Edit, or Launch. If you get a “No Signings Found” message, you’ll need to create a signing event for the file.
You will be taken to the signing session, where you’ll be able to verify that the signer has passed the ID verification and KBA check. Once you’ve confirmed the identity of the signer, start the signing session to begin recording.
If you’re still not sure how to do something while using ProperSign or are having any technical issues, you can click the “Create Ticket” button in the Support window to alert our team. The “Need Help” button at the lower right-hand corner will launch automated guides to show you how to complete essential steps in setting up your account or creating a signing event.
If you’d like to see more, sign up for a live demonstration of ProperSign.