Help Center
How to Use Templates
The Difference between a Document Template and a Tagging Layer Template
In addition to placing tags manually on a document with the Edit option, you can add tags with templates. Templates help you format standard information for a document, so you don’t have to recreate it every time. There are two types of templates in ProperSign:
- Document Templates – Enables you to store pre-tagged documents within ProperSign, which can then be added to any new file without the need to upload a document for each file. This type of template is best used for forms or documents that never change, like a tax form, for example.
- Tagging Layer Template – Enables you to pre-configure a tagging layer that can be applied to documents that are uploaded into ProperSign on a per-file basis. This type of template is best used for documents with consistent formatting, but the information changes for each file. For Example, a Warranty Deed has a unique property description, dates, and names that change per file, but the signature lines stay in the same place.
How do I create a template?

To create a document template or a tagging layer template:
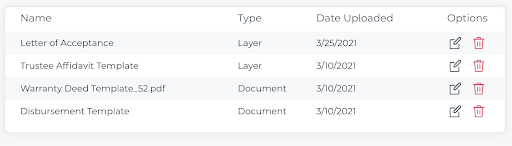
- Navigate to Templates on your sidebar menu.
- Click on the green plus sign on the top right to add a new template.
- Select a file as the basis of the template.
- Name the document.
- Designate the responsible signer.
- Choose which type of template you’re creating — Document or Layer.
- Add the number of customers.
- Click upload.
Once you’ve uploaded the document, click on the edit icon to add the appropriate tags.
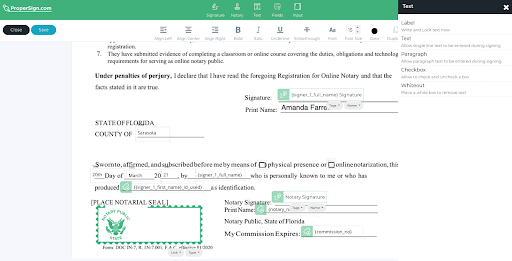
THERE ARE FIVE CATEGORIES OF ELEMENTS YOU CAN ADD TO A DOCUMENT, WHICH INCLUDE:
1. Signature – creates a field to allow all parties designated on the file to apply their signatures, initials, and signing date.
2. Notary – apply notary seal field, associate notarial certificate, add notary name, signature, initial, commission expiration date, and commission number fields to the document.
3. Text – these options allow you to make specific changes to one document. Text elements include:
- Whiteout – if there are any typos or incorrect information on the uploaded document, use this option to remove the text.
- Label – write and lock text that can’t be altered at the signing event.
- Line Text – creates a field for single-line text to be entered during the signing.
- Paragraph – creates a field for multiple-line text to be added during the signing.
- Checkbox – create a check box.
4. Fields – creates custom fields related to your file information like file number, customer name, customer, email, and customer phone number.
5. Input – adds a field to pull in information based on your singing event, like the signing date.